Installing MapMining
MapMining is a Chrome extension. Installing it takes about two minutes. You need Google Chrome on a computer (Windows, Mac, Linux or ChromeOS). It doesn’t work on phones or tablets.
An orange frame in each picture marks what to press. Where a picture has several, the numbers match the list below it.
1. Add MapMining to Chrome
-
Open the MapMining page in the Chrome Web Store.
-
Press Add to Chrome.

-
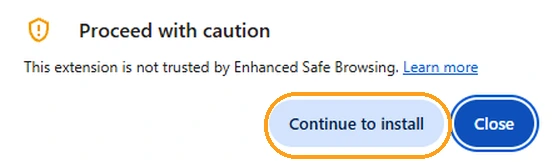
Only if you see “Proceed with caution”: press Continue to install. See below why it appears.
-
Chrome asks Add “MapMining”? and says it can read and change your data on a number of websites. The list (press Show all to see every site) is Google Maps, mapmining.app and Google’s sign-in and database services (
identitytoolkit,securetokenandfirestore.googleapis.com), which MapMining uses for your account and credits. Press Add extension.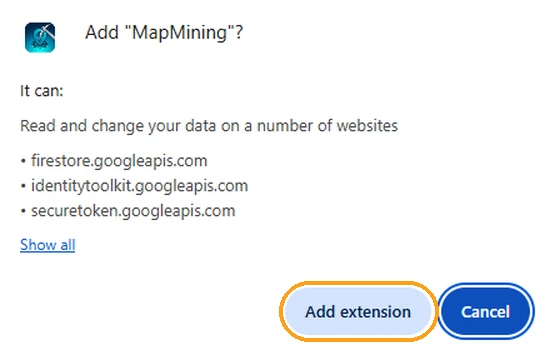
Why Chrome may say “Proceed with caution”
If you use Chrome’s Enhanced Safe Browsing, Chrome may show Proceed with caution: This extension is not trusted by Enhanced Safe Browsing before the install dialog. Chrome shows this for extensions from publishers that are new to the Chrome Web Store. Google marks a publisher as trusted after a few months of following the store’s policies. It isn’t a finding about MapMining itself, which passed the Chrome Web Store review.
When it’s installed, a welcome page opens on mapmining.app with the same three steps as below. You can follow it or close it.
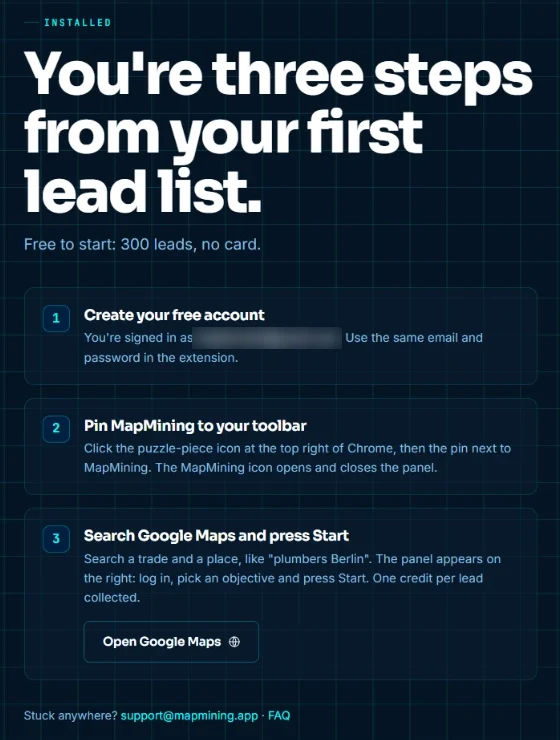
MapMining only asks for Google Maps, mapmining.app and the Google services it signs you in with. Reading businesses’ websites (X-Ray) is optional, and it asks for that later. See Website access for X-Ray.
2. Pin the icon to the toolbar
Chrome hides new extensions behind the puzzle-piece icon at the top right.
- Press the puzzle-piece icon next to the address bar.
- Find MapMining in the list and press the pin next to it.
The MapMining icon now stays in your toolbar. Pressing it opens and closes the panel on Google Maps.
3. Open Google Maps and log in
Open Google Maps. The MapMining panel appears on the right. Log in with your MapMining account. If you don’t have one yet, press Create one free at the bottom of the panel, or sign up here: 300 leads, no card.
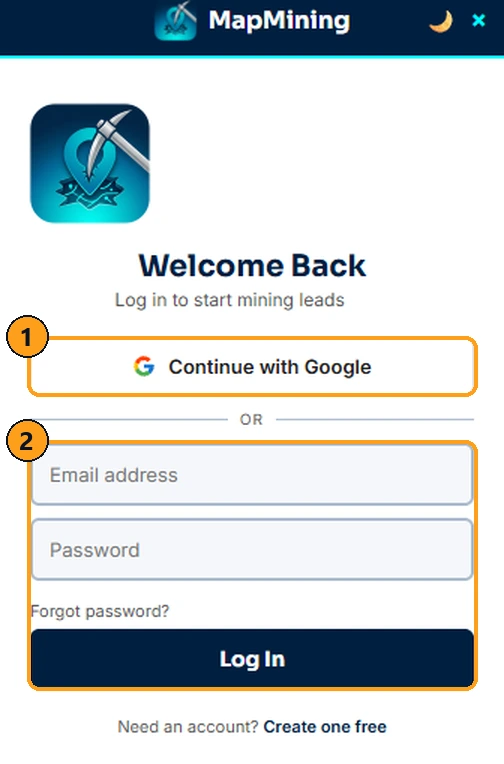
- Signed up with Google? Press Continue with Google. A page on mapmining.app opens (see step 4).
- Signed up with email? Type your email and password and press Log In.
4. Google accounts: press Connect
If you pressed Continue with Google, a page on mapmining.app opens. Sign in there if you aren’t already, check that the email shown is yours, and press Connect.
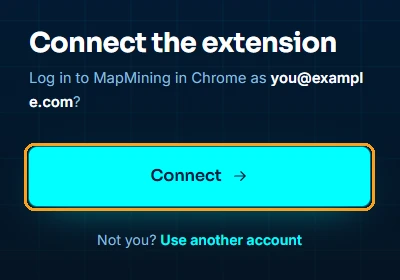
Go back to the Google Maps tab. The panel is now logged in. If it says Extension not found, see Logging in to the extension.
5. Search Google Maps
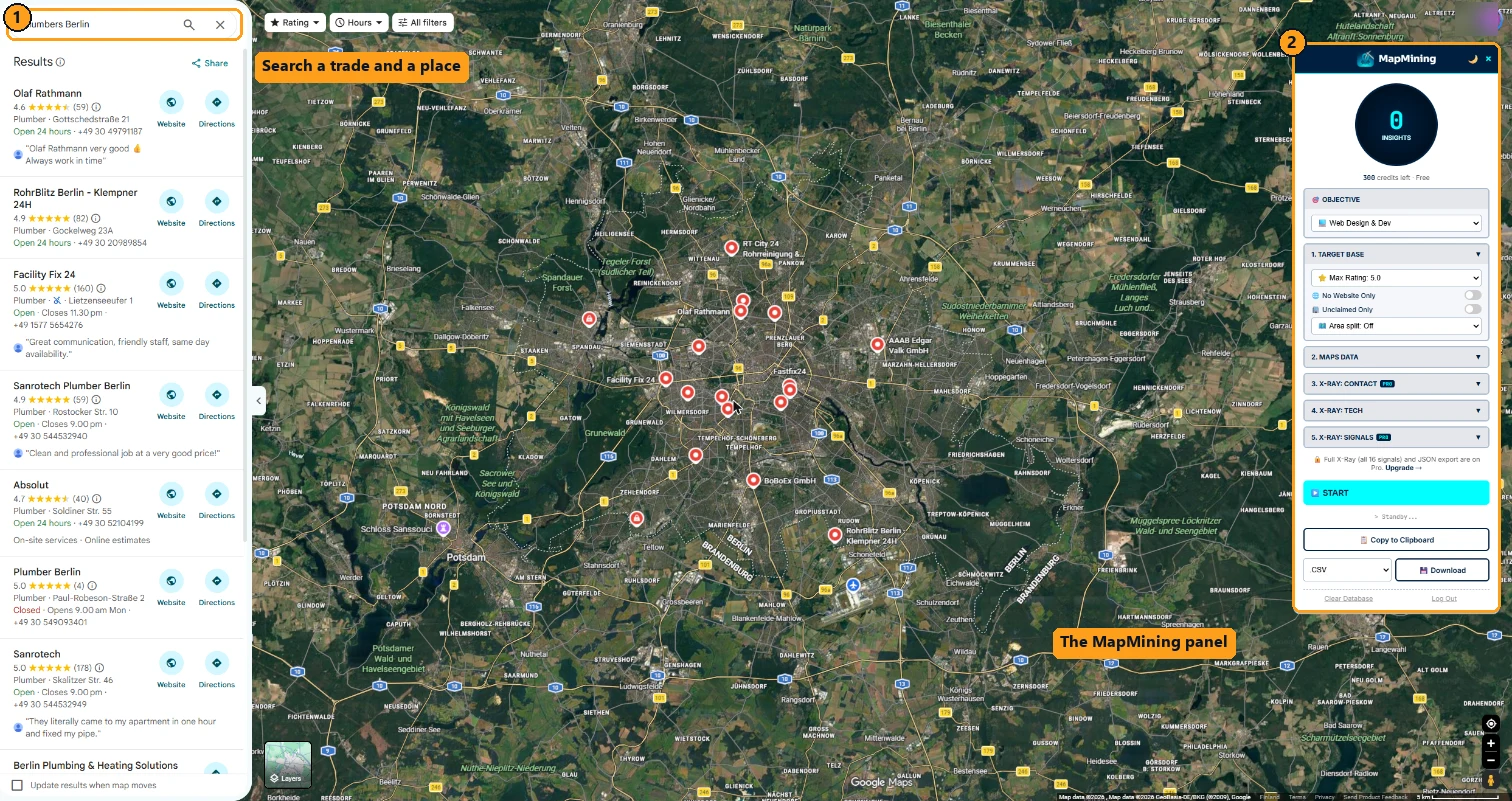
Search for a trade and a place in the Google Maps search box (1), for example plumbers Berlin or dentists Manchester. The results appear on the left and the panel stays on the right (2).
6. Set up the run and press Start
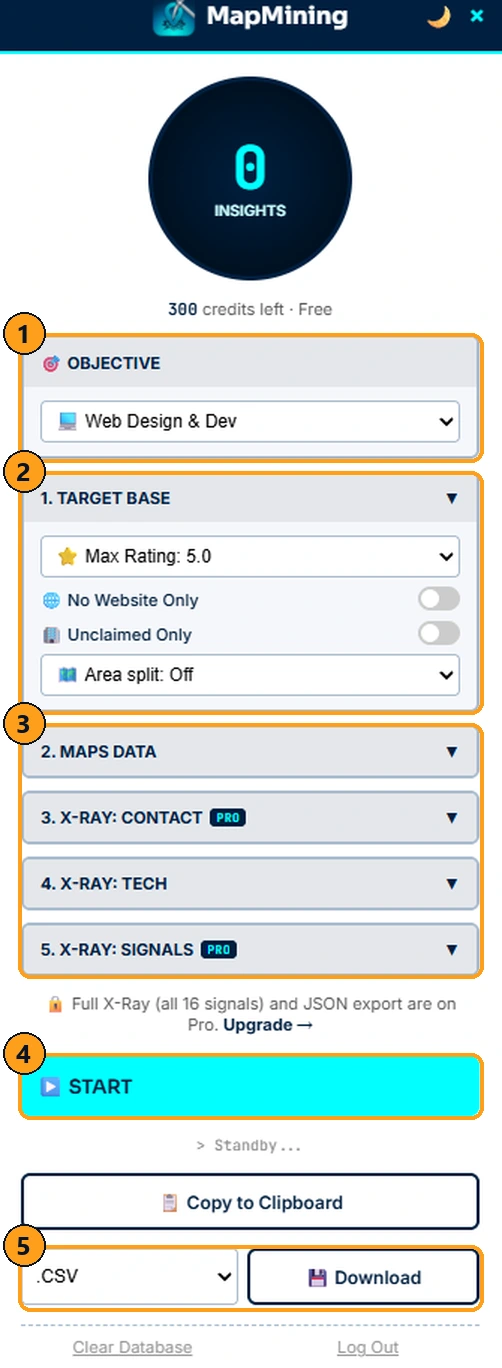
- Objective: what you sell. Web Design & Dev, Ads & Marketing or Local SEO & GMB. Every lead is scored 0–100 for it.
- Target Base: narrow the run before it starts, for example No Website Only or Unclaimed Only. Businesses you filter out don’t use credits.
- Maps Data and X-Ray: open a section to choose what to collect. X-Ray reads each business’s website; options marked PRO or STARTER need that plan.
- START: MapMining goes through the results one by one. You can pause, resume or stop at any time.
- Download: when the run is done, pick .CSV (or .JSON on Pro) and press Download, or use Copy to Clipboard.
Each lead collected uses one credit. Your balance is shown under the counter at the top of the panel.
Next
- Objectives and scoring: how the 0–100 score works.
- Website access for X-Ray: allowing MapMining to read websites.
- Exports: what each column means.
- Troubleshooting: the panel doesn’t appear, or a run stops.